

Quickstart (10 minutes)
Welcome! In this Quickstart, we’ll guide you through building your first model in Dalus. We’re going to build a model of a satellite with 3 reaction wheels, design a simple attitude control system, and then verify a key performance parameter,settling_time, for that control system.
Whether you’re new to system modeling or just getting started with Dalus, this hands-on example will help you get up to speed quickly and confidently.
Step 1: Create a New Model
Start by creating a new model in the Dalus dashboard. Give your model a descriptive name, such as “Satellite Quickstart”. This model is the isolated, collaborative environment that will contain your system’s requirements, architecture, and analysis all in one place.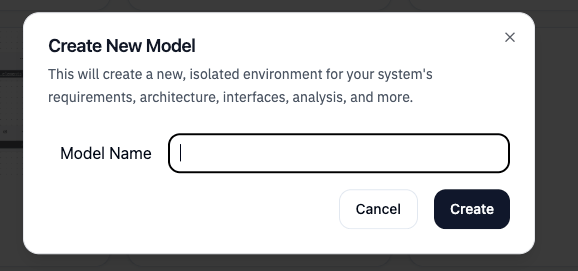
Step 2: Define Requirements
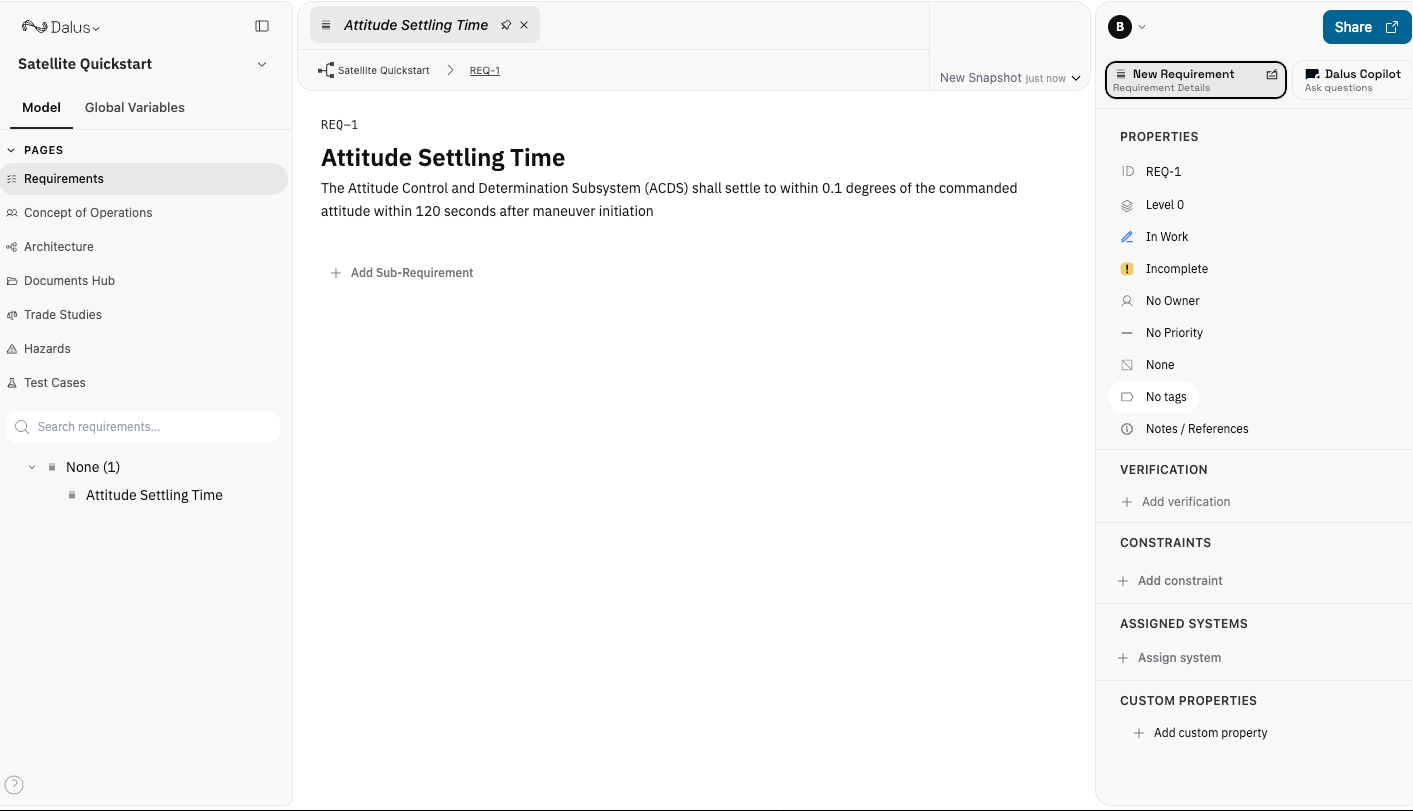
Satellites need to respond to new attitude commands from the ground promptly to face the necessary direction for imaging, telemetry, etc.. Let’s add a requirement that specifies the maximum allowable time to complete a commanded attitude maneuver:Requirement: The Attitude Control and Determination Subsystem (ACDS) shall settle to within 0.1 degrees of the commanded attitude within 120 seconds after maneuver initiation.
Step 3: Build the Structure
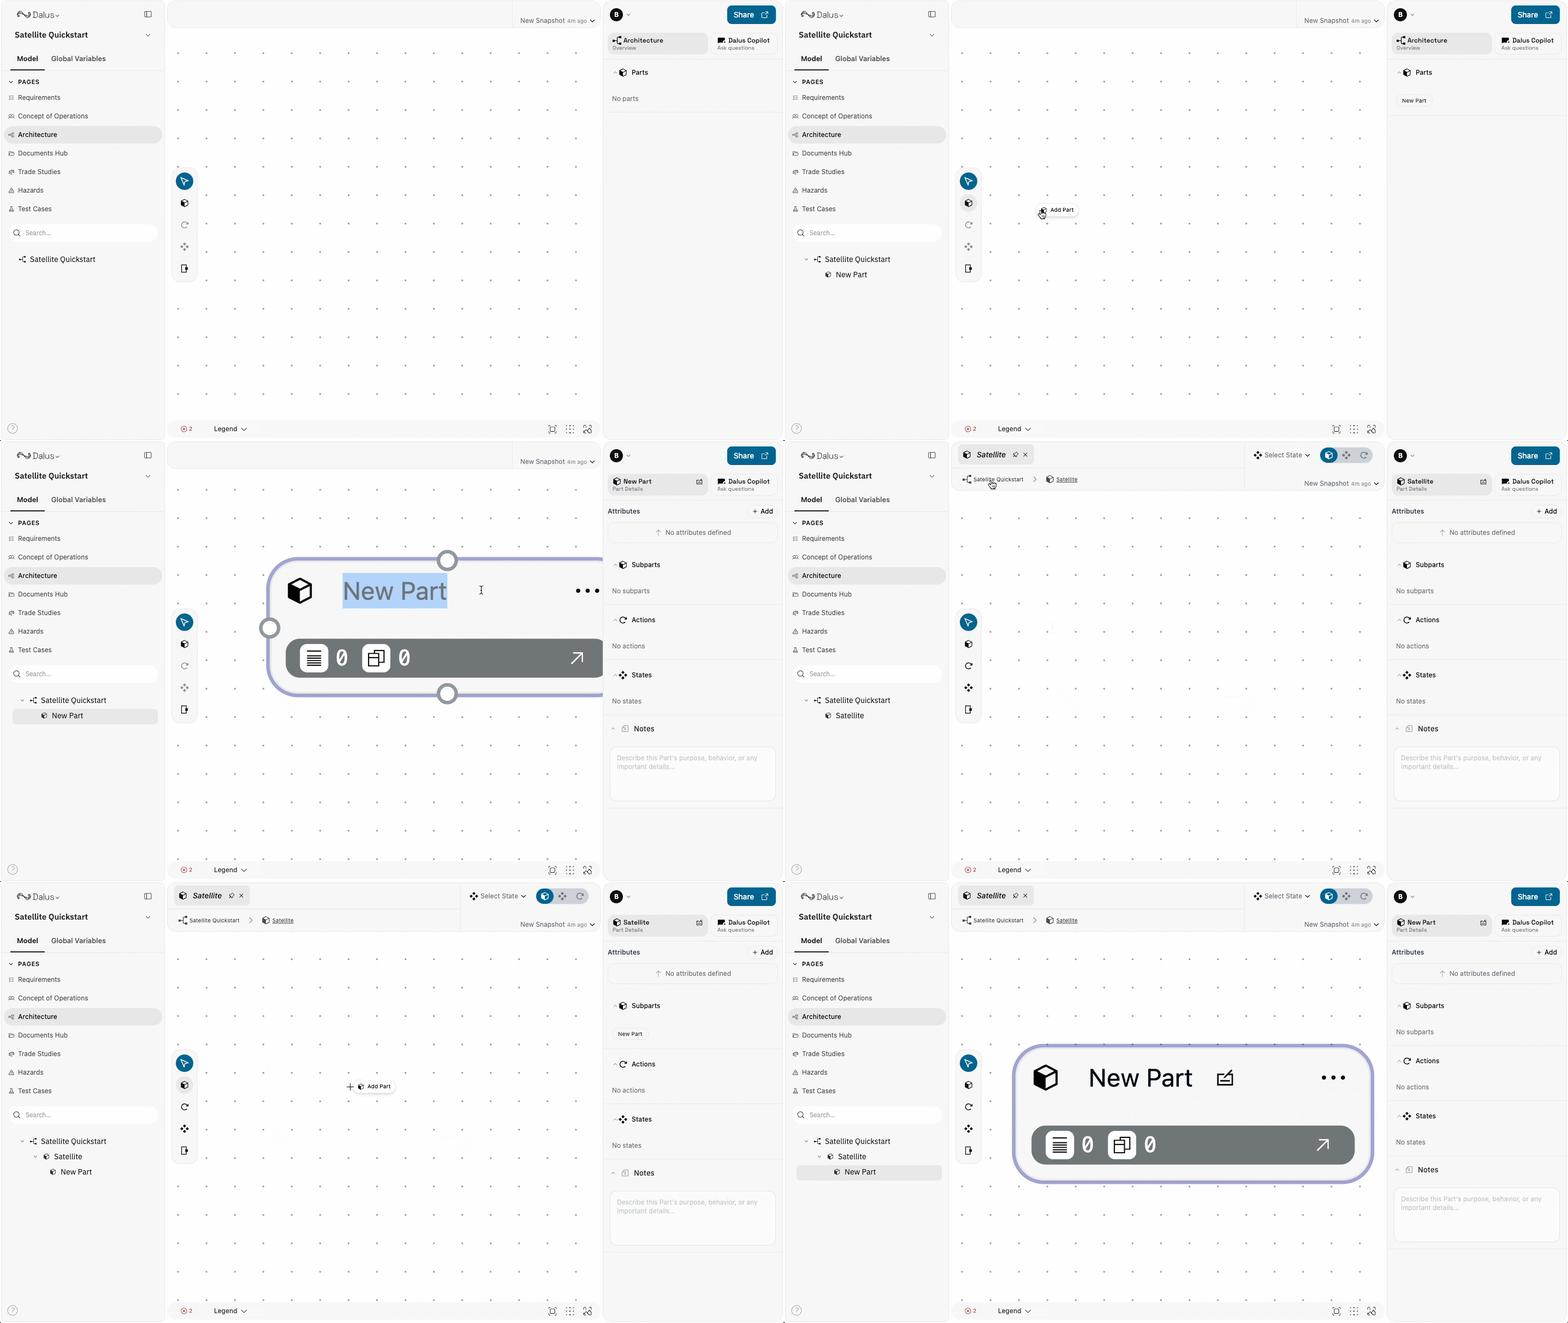
Now let’s define the basic structure of our satellite. We’ll start by adding the main parts we’ll be focusing on for this quickstart:- Add the Satellite as the root part of your model.
- Double-Click into the Satellite and add these subparts:
- Reaction Wheels (x3): Add three reaction wheel components to represent the 3-axis control system.
- Attitude Control & Determination System (ACDS): Add the Attitude Control and Determination Subsystem as a separate part.
Step 4: Add Part Attributes
Now that we have the foundation, let’s assign some attributes. Attributes are values like “mass” or “moment of inertia” that describe a part’s physical properties and are accessible by any analysis we do. Add the satellite’s mass-moments of inertia as attributes in the Right Sidebar: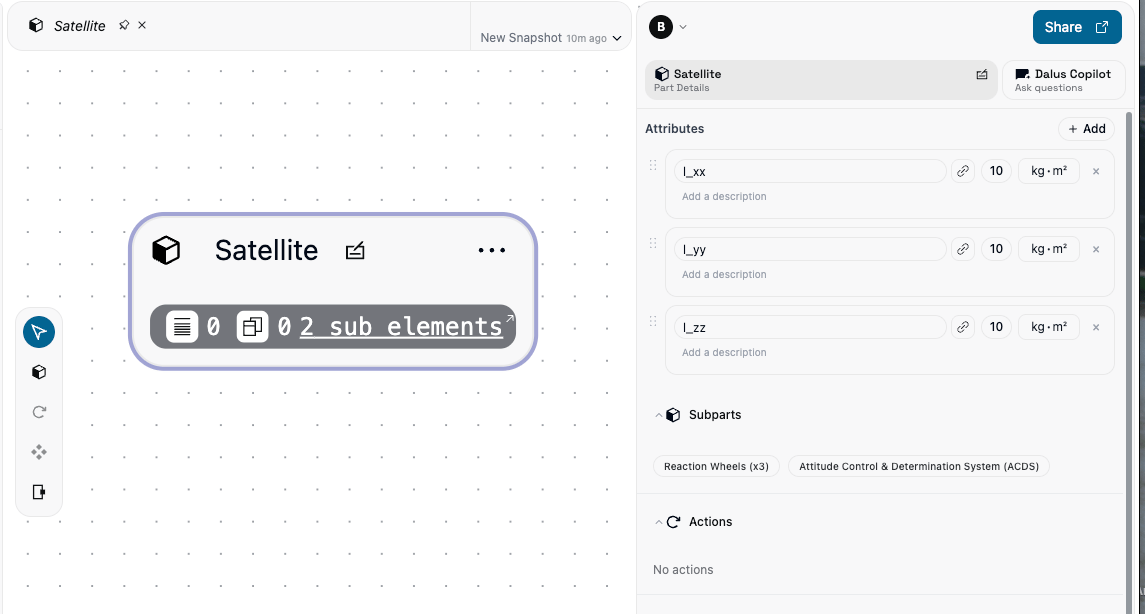
Step 5: Configure an Action (Analysis)
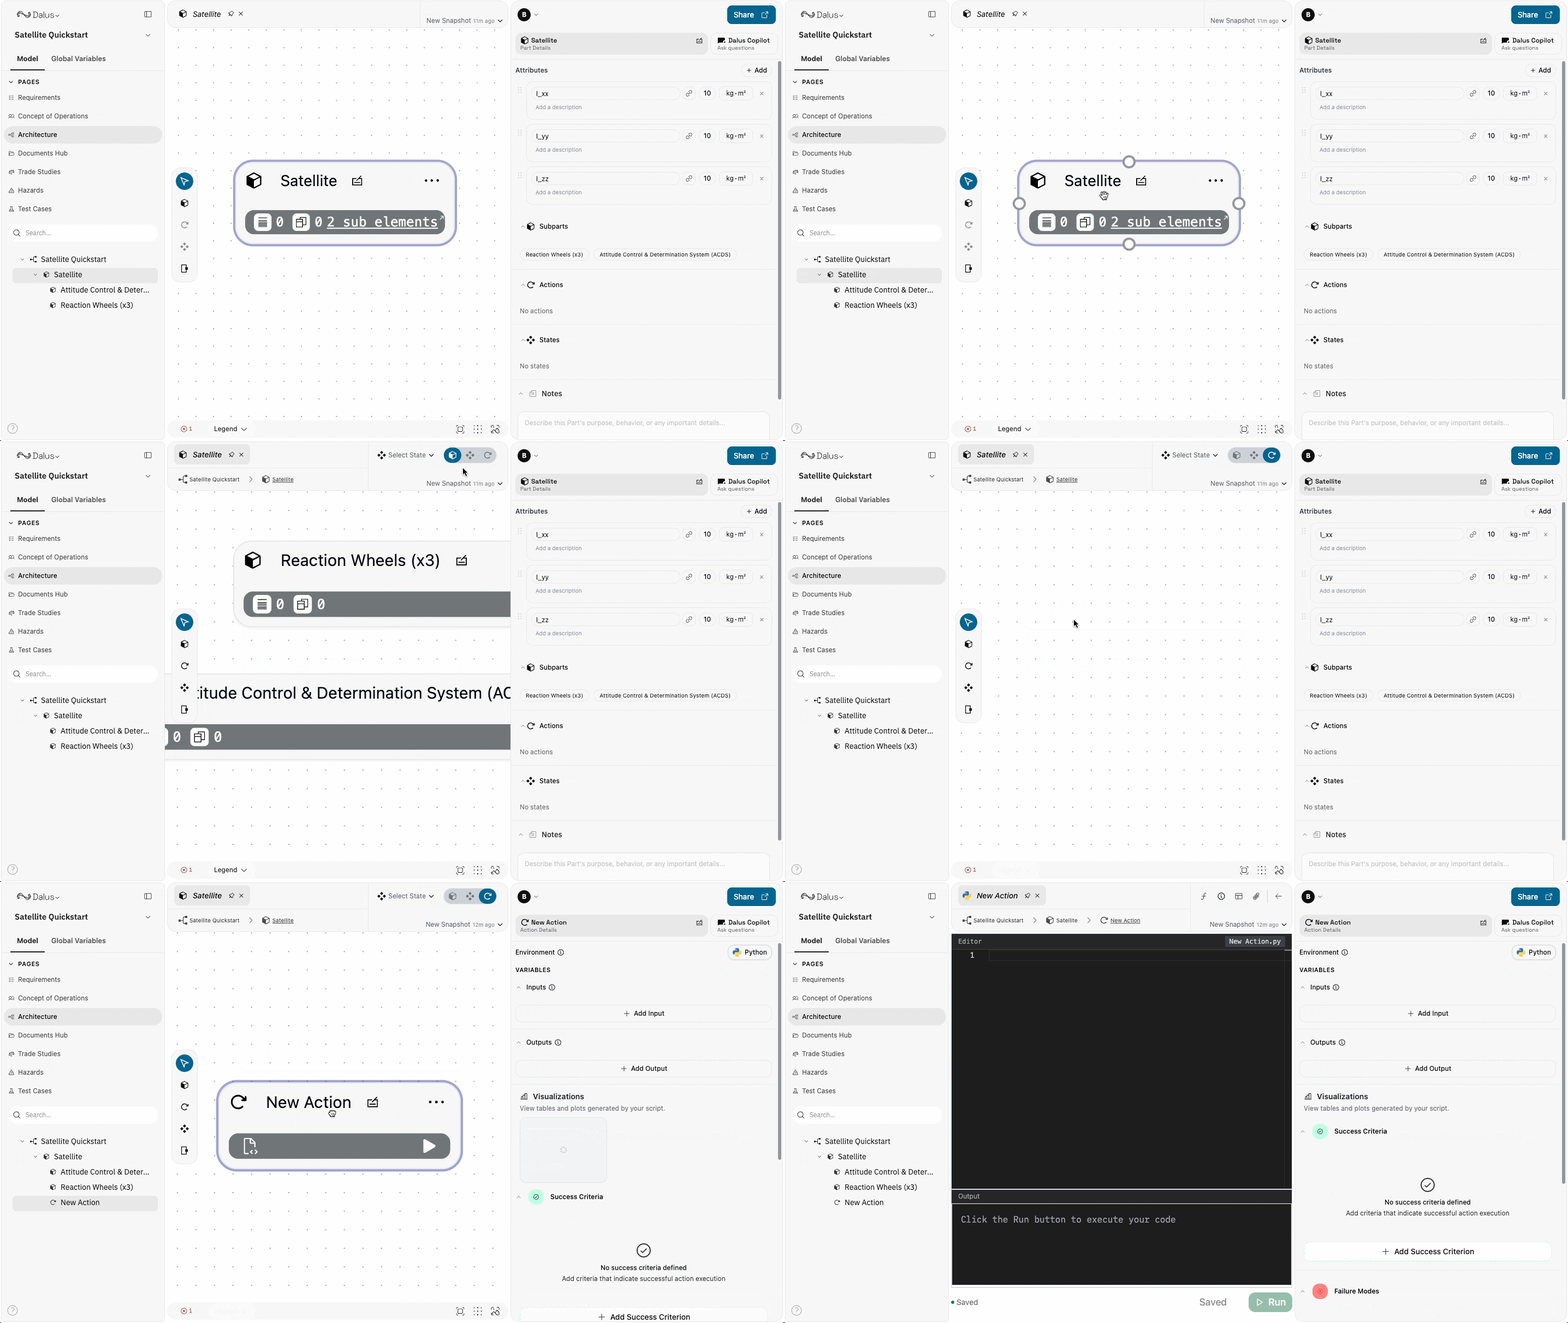
In this step, we’ll implement the action Point Satellite inside the Satellite part, which takes a commanded attitude and calculates how long it takes (among other things) to reach that attitude from its initial attitude (0,0,0).- First, switch to the Action view in the Dalus interface. This will allow you to create and configure actions for your model, in this case, for the Satellite part.
- Add an action and name it “Point Satellite”.
- Double-click on the action and copy and paste this python code inside, which implements a simple Proportional-Derivative controller in 3 axes:
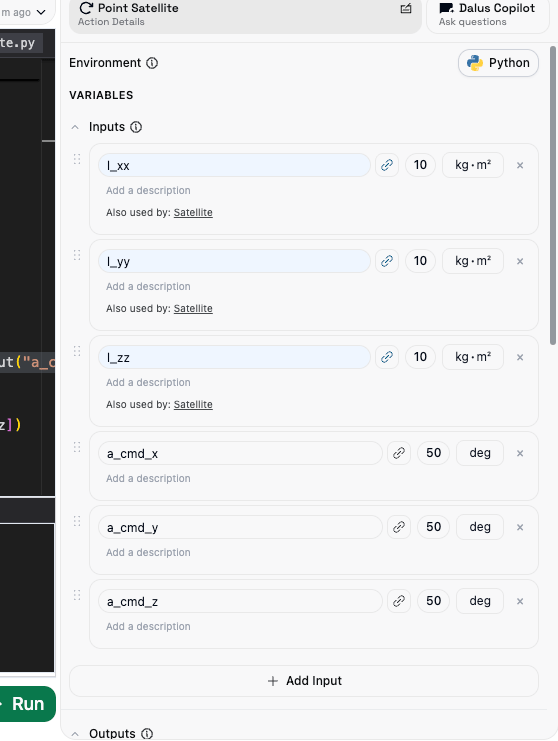
You’ll also notice we’re grabbing commanded attitude variables:
a_cmd_x, a_cmd_y, and a_cmd_z. Add these as inputs as well:
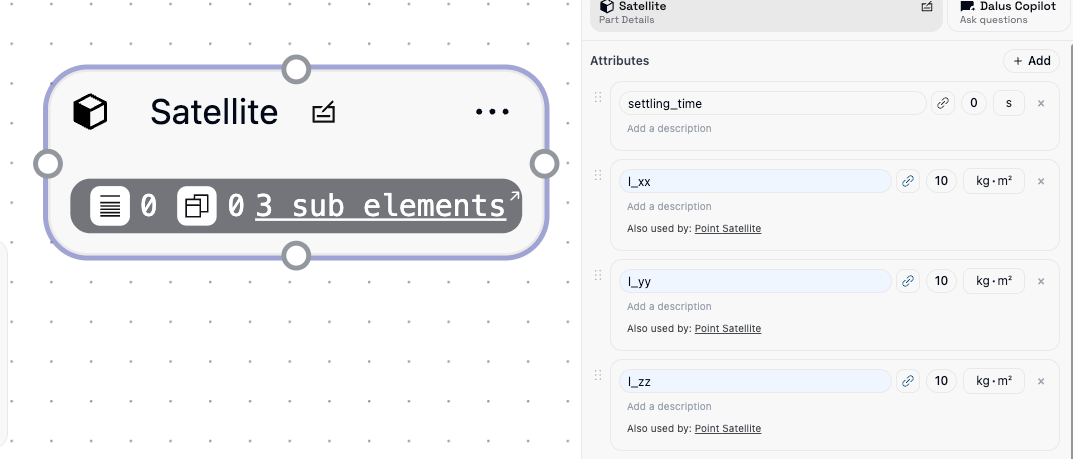
settling_time; this is the key performance parameter we are evaluating. Go back to the Satellite part and add it as an attribute.
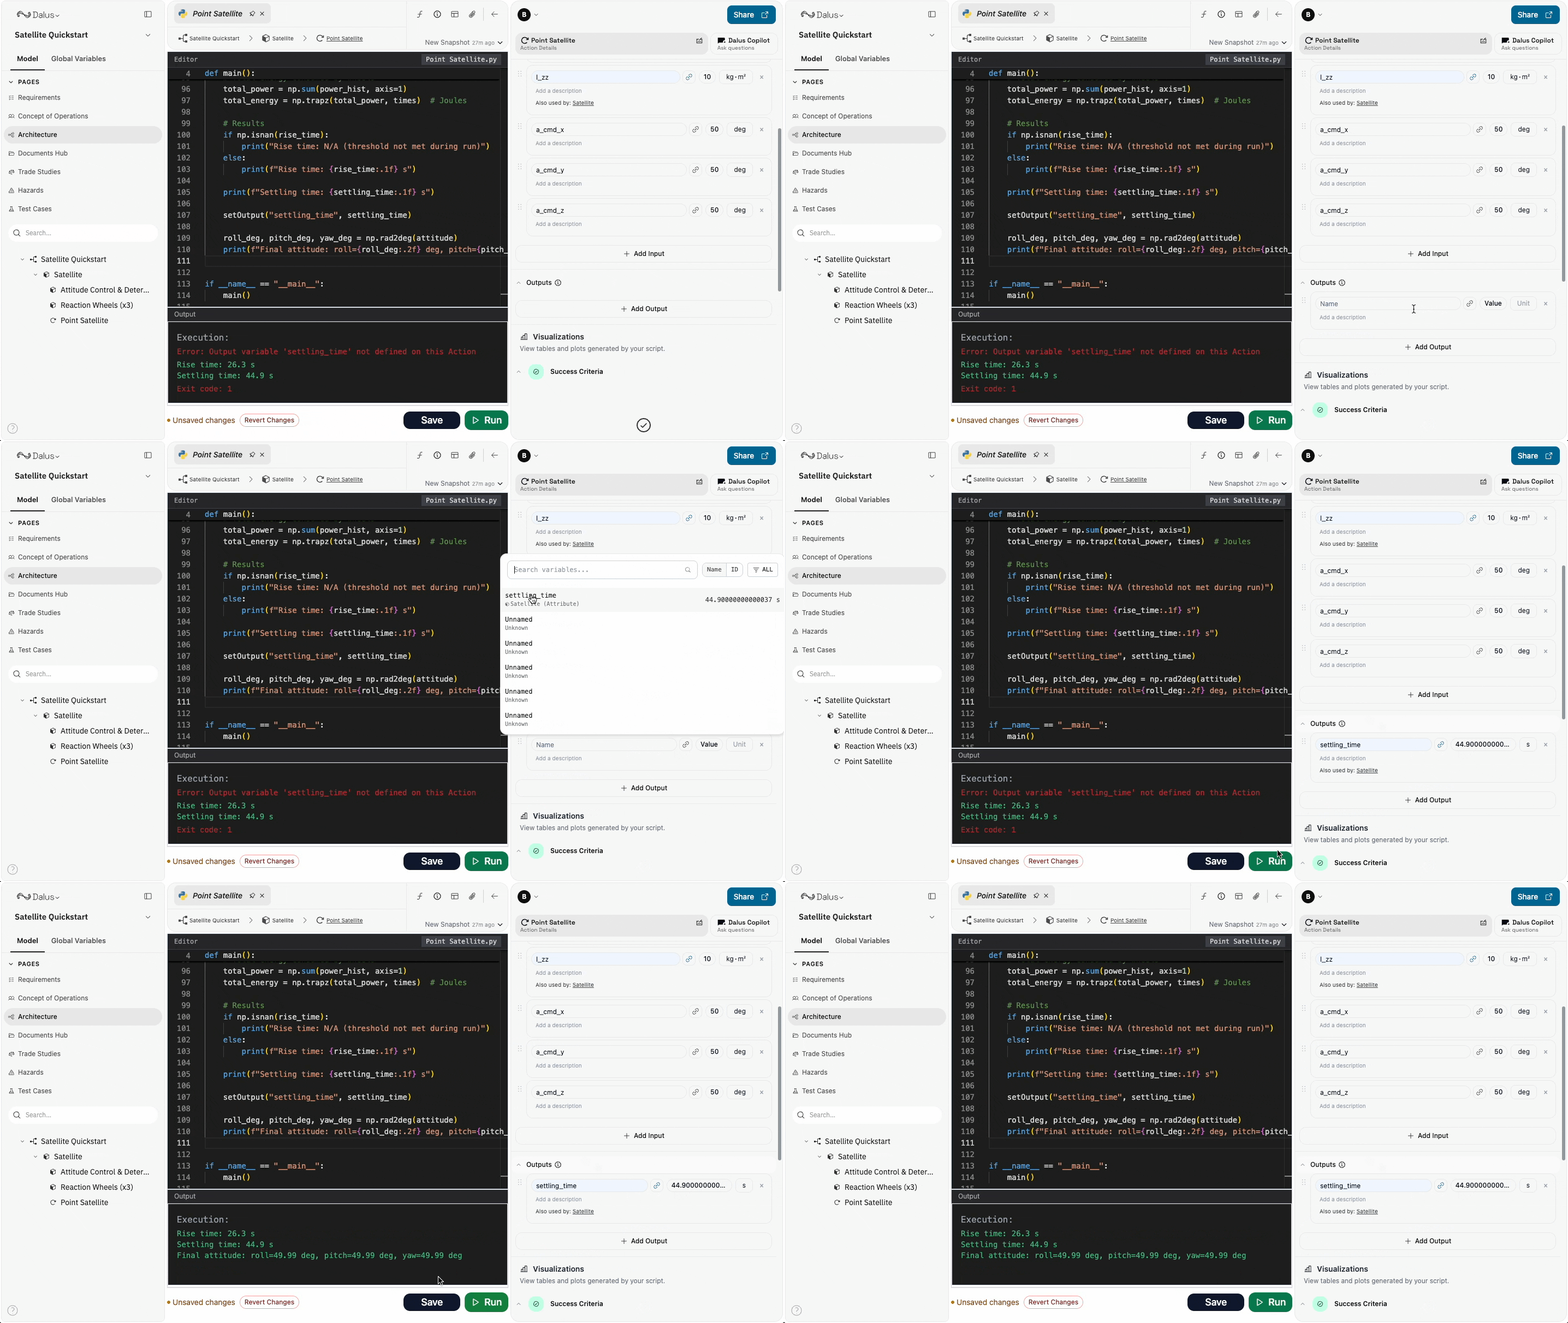
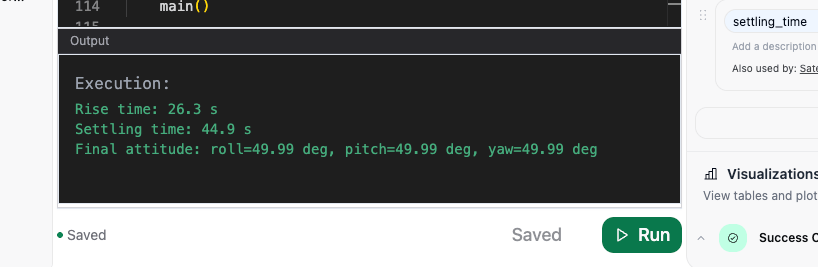
settling_time as an Output in the Right Sidebar for the Point Satellite action. Click the Run button to execute the analysis—the script will calculate and output the settling time value.
Step 6: Add a Requirement Constraint and Test
Now, let’s return to our requirements and add a constraint to the ACDS settling time requirement:- Go to the requirements view and locate the ACDS settling time requirement.
- Click on its status, then under Add constraint, select the Attributes dropdown.
- Choose
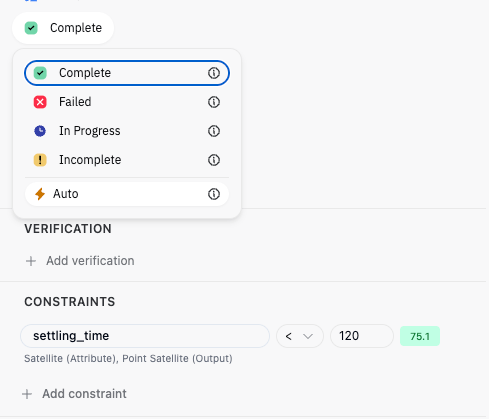
settling_timeand set the limit to< 120 seconds. - You’ll see the requirement status immediately update based on its current value.
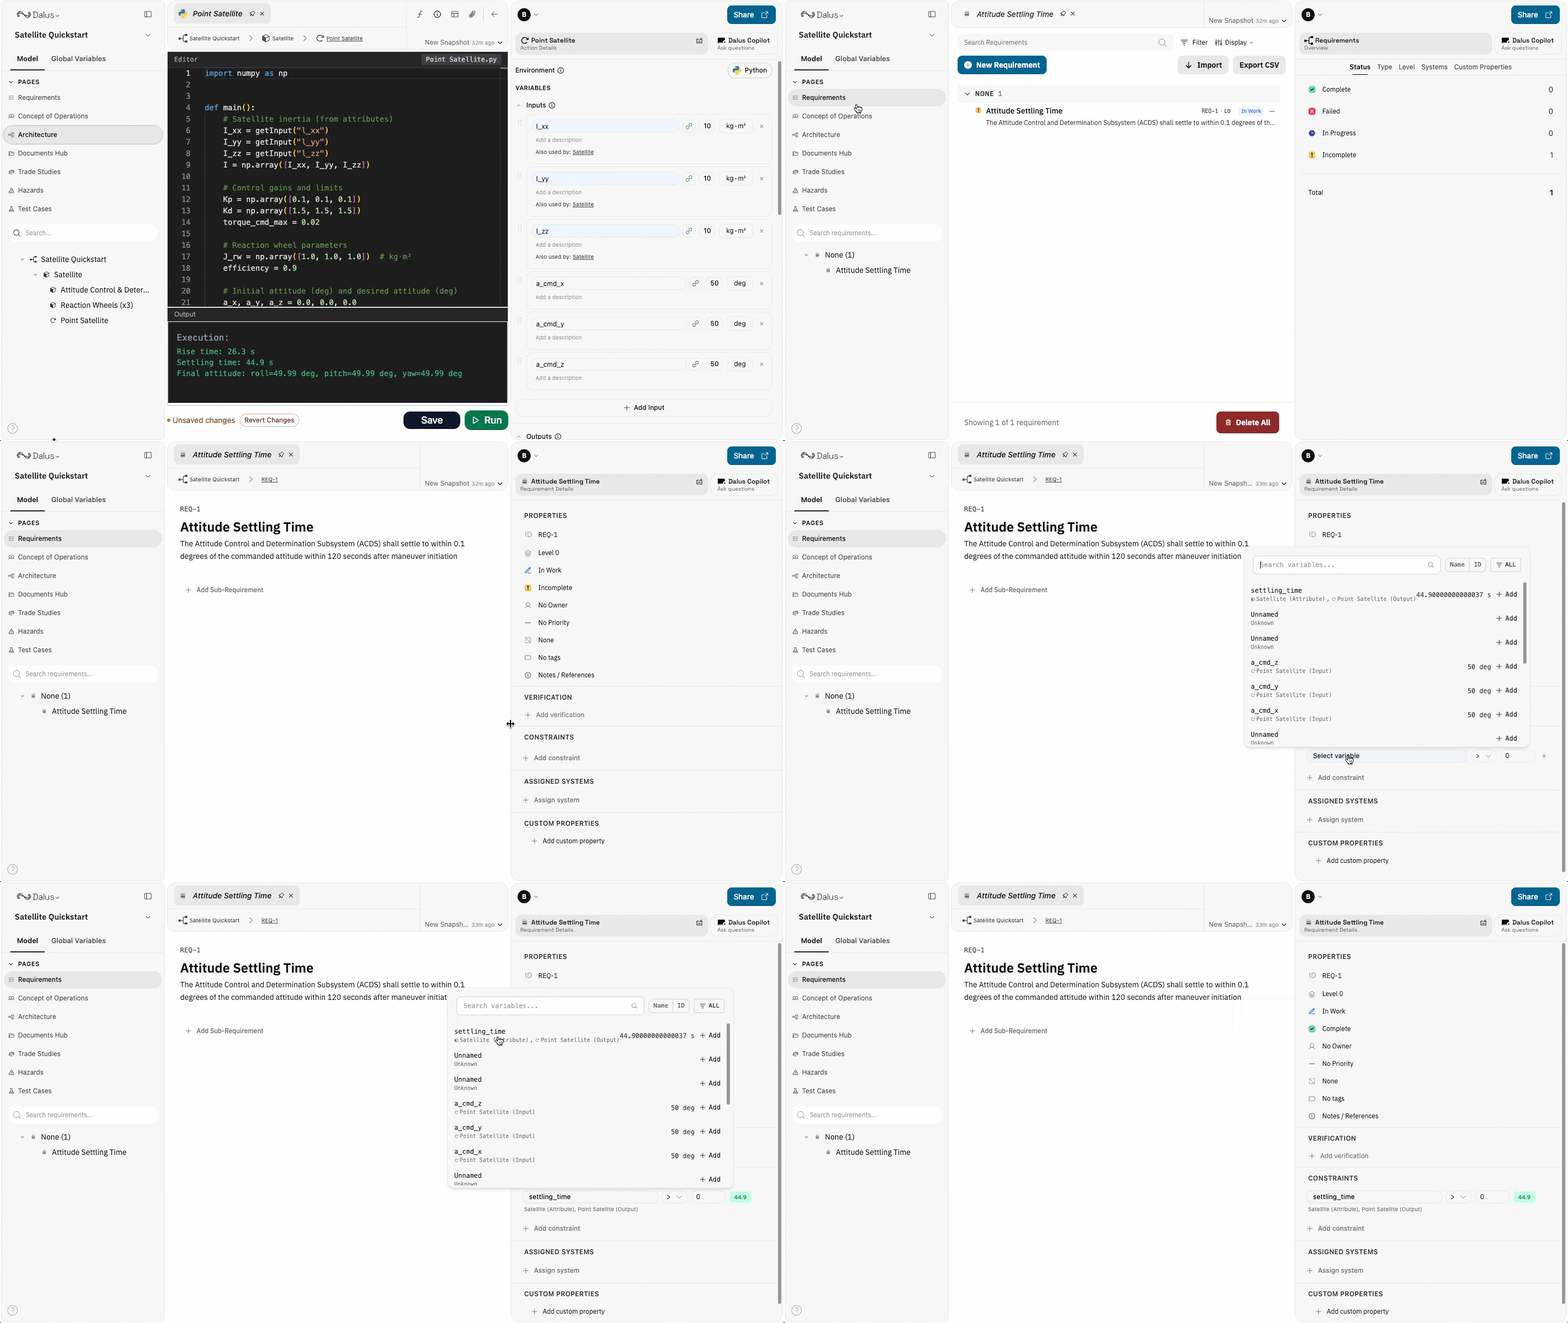
l_xx) in the action’s inputs and re-run the simulation. Try to get the requirement to fail!
Step 7: Create a Simple State Machine
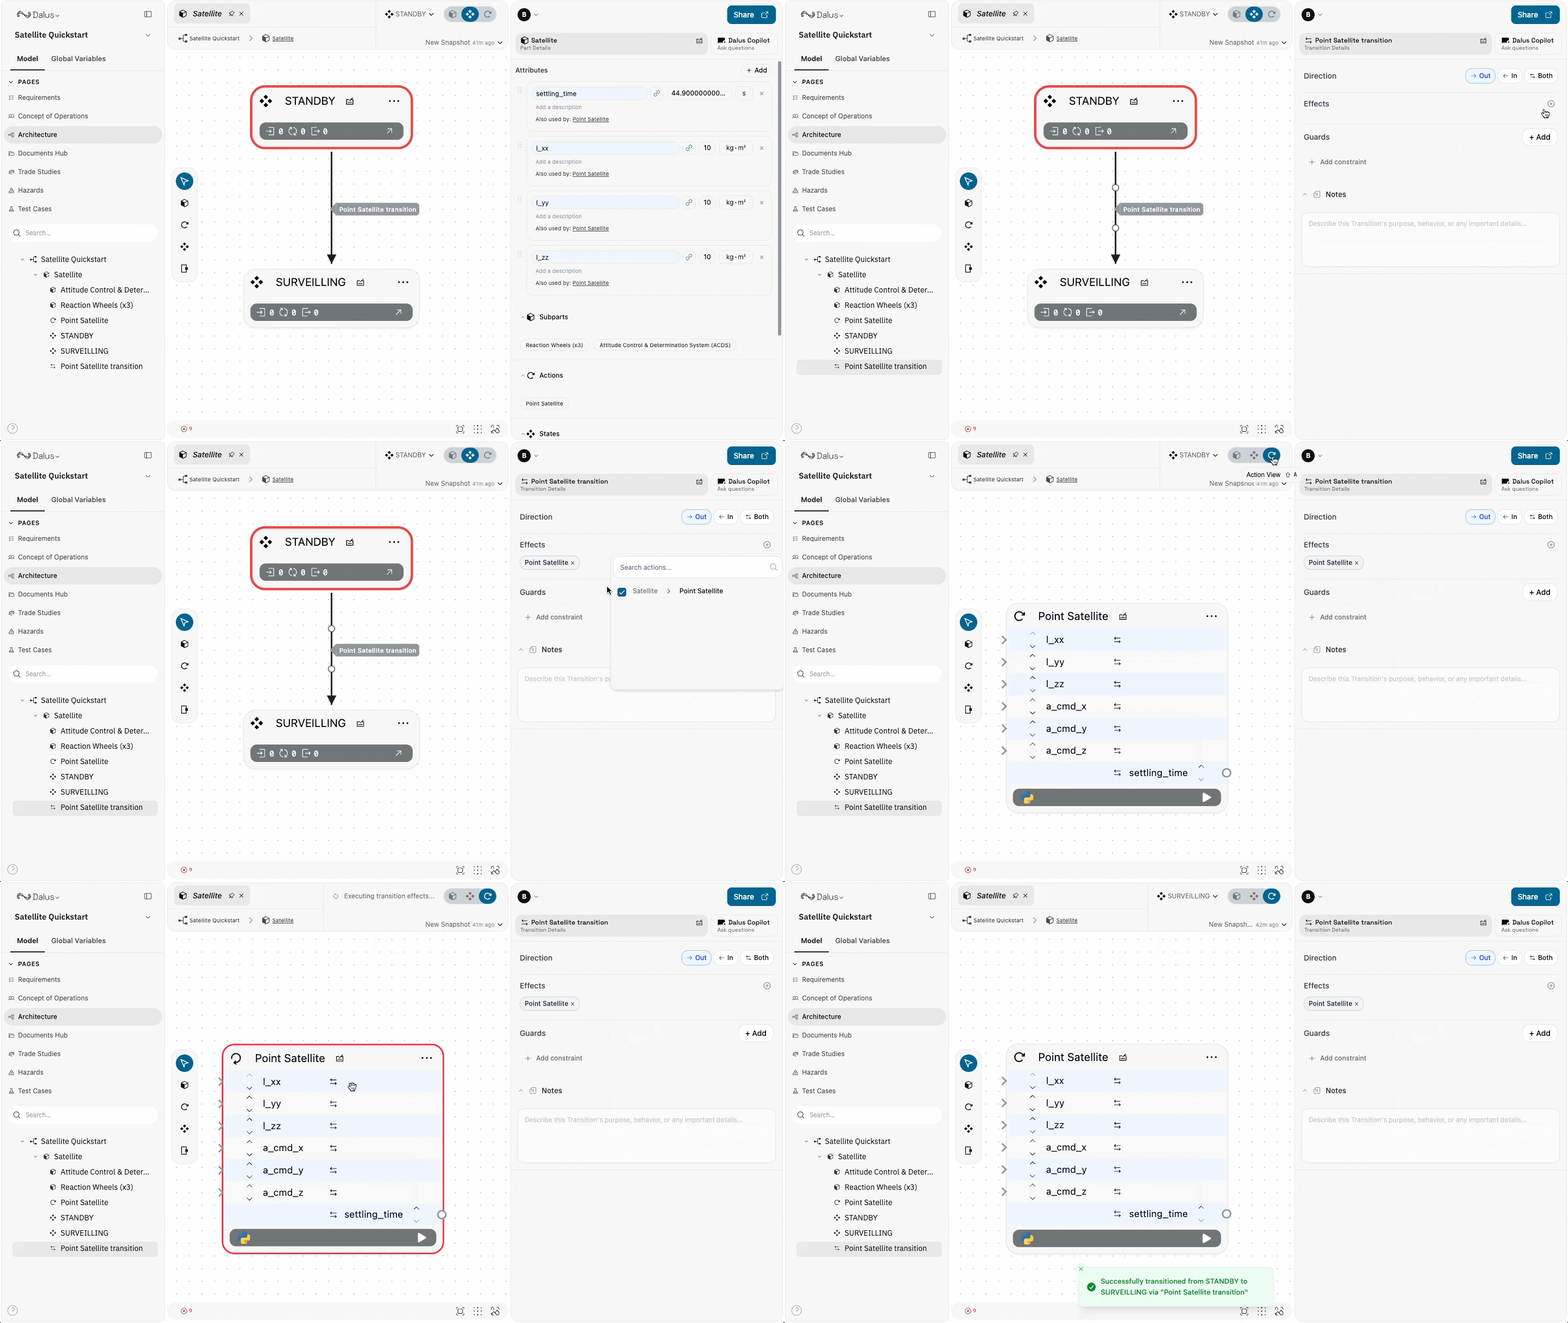
Next, let’s create a simple state machine to trigger our Point Satellite action instead of manually running it.- Switch to the State view.
- Define two states:
STANDBYandSURVEILLING. - Select the
STANDBYstate and enable Entry State in the Right Sidebar to make it the initial state.
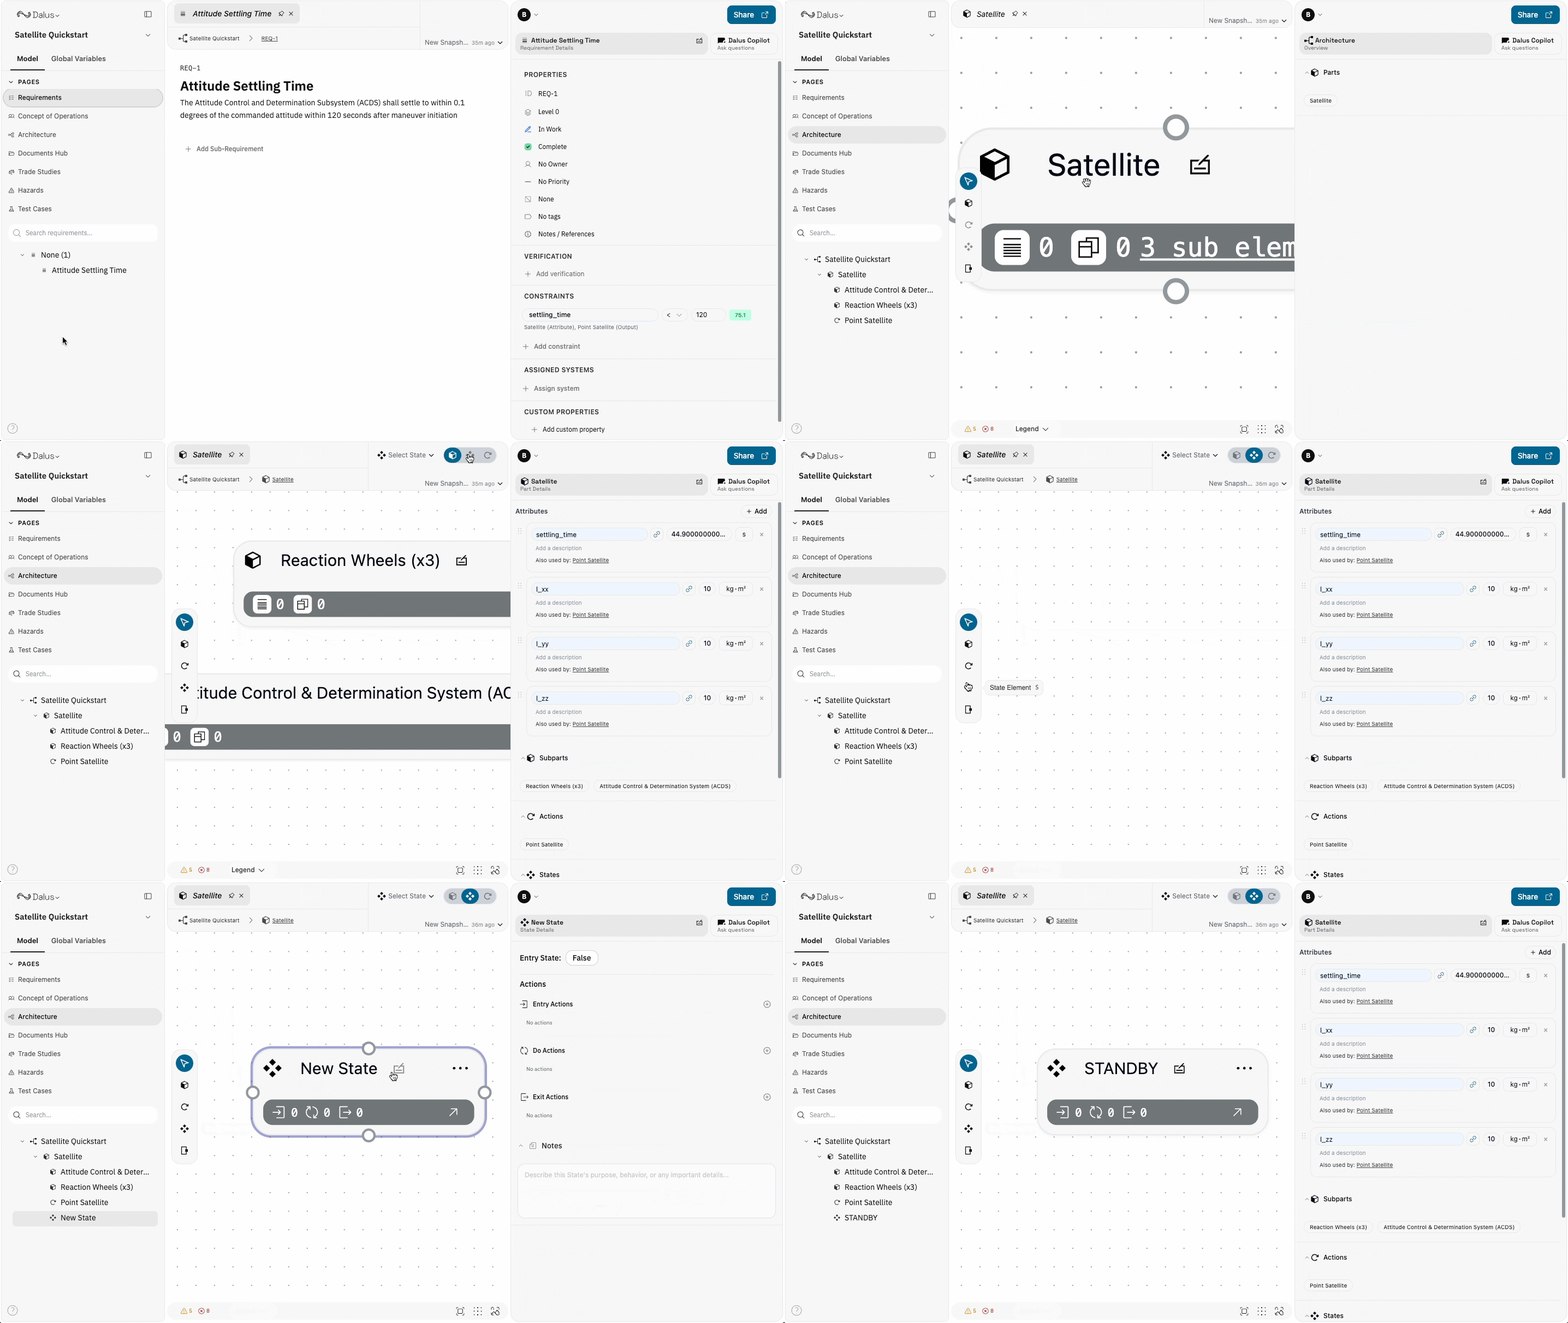
- Connect them to add a transition between them. Name it anything.
- In the Point Satellite transition, select the Point Satellite action as an effect. This causes the action to execute whenever you transition from Standby to Surveilling.
- Use the states dropdown to first enter
STANDBY. Then, switch to the Action view and transition toSURVEILLINGto observe the effect taking place.
Next Steps
Ready to take your model to the next level? Here are a few ways you can extend and improve your satellite model:-
Add a Hazard:
- Identify a potential failure mode, such as “Reaction wheel failure causes loss of attitude control.”
- Document the hazard severity, likelihood, and mitigation strategies.
- See Hazards for more details.
-
Create a Test Case:
- Define a test case to verify the settling time requirement under different initial conditions.
- Specify test inputs (e.g., commanded attitude of 90° on each axis) and expected outcomes.
- See Test Cases for more details.
-
Run a Trade Study:
- Compare different control gain configurations (
Kp,Kd) to find the optimal balance between settling time and power consumption. - Use the trade study feature to evaluate alternatives side-by-side.
- See Trade Studies for more details.
- Compare different control gain configurations (
-
Parameterize Control Gains & Reaction Wheel Moments:
- Add the proportional (
Kp) and derivative (Kd) gains as inputs to the Point Satellite action instead of hard-coding them in the script. - Similarly, add the Reaction Wheel moments (
J_rw_x,J_rw_y,J_rw_z) as inputs. This organizes your parameters logically, making them easy to find and tune as your model grows in complexity.
- Add the proportional (
-
Model Command Inputs from Ground Control:
- Add a new part called Ground Control at the same level as the Satellite.
- Connect the parts together to form an interface and add connections for
a_cmd_x,a_cmd_y, anda_cmd_zinstead of assigning them as inputs to the action. - In your script, use
getConnectionto access these command variables instead ofgetInput.
-
Set and Reset the Satellite’s Current Attitude:
- Add
attitude_x,attitude_y, andattitude_zattributes (0 deg) to the Satellite in the Right Sidebar → Attributes. - Update the Point Satellite script to fetch these values and use them as our initial attitude instead of hard-coding the initial attitude to
(0,0,0)(see line 22). - At the bottom of the Point Satellite script, use
setOutputto write back the finalattitude_x,attitude_y, andattitude_z(degrees). - In the actions view inside Satellite, create an action named “Reset Attitude” that sets the three attitude attributes back to
0. - In the states view inside Satellite, add a Reset Satellite transition from
SURVEILLINGtoSTANDBY, and setSTANDBY’s Entry Action to execute Reset Attitude. - Now, transition the Satellite back and forth between
SURVEILLINGandSTANDBYto see its attitude change.
- Add